نحوه ساخت دکمه Swipe با سبک آی او اس در اندروید
اگر حتی یک بار هم گوشی آیفونی را در دست گرفته باشید، با دکمه slide to unlock معروف آشنایی دارید.
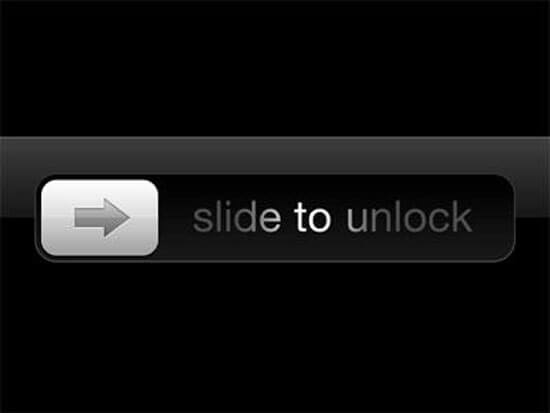
هدف اصلی که پشت پرده این دکمه قرار دارد جلوگیری از باز شدن قفل گوشی به طور اتفاقی است، از طرفی ممکن است نیاز باشد تا در اپلیکیشن های موبایل نیز گزینه ای را در اختیار کاربر قرار دهید تا با استفاده از آن، کاربر یک اقدام قطعی را به تایید برساند. اپلیکیشن Uber چنین امکانی را در اختیار رانندگان می گذارد و با کشیدن این دکمه در اپلیکیشن آنها تمایل خود بابت آغاز یک سفر را به تایید می رسانند.
راه حل این کار نمایش صفحه ای به کاربر است که توسط آن یک عمل خاص را به تایید می رساند، اما این راه حل چندان جالب و تاثیرگذار نمی نماید. از این رو می خواهیم دکمه swipe را در اندروید پیاده سازی کنیم، کدهای نهایی این پروژه در GitHub قرار داده شده اند و در صورت تمایل می توانید نگاهی به آنها بیندازید.

شروع کار
یک پروژه جدید با ساختار Blank Activity در اندروید استودیو بسازید.
یک کلاس به نام SwipeButton که از کلاس Button اکستند شده است ساخته و قطعه کد زیر را به آن اضافه نمایید:
import android.content.Context;
import android.util.AttributeSet;
import android.widget.Button;
public class SwipeButton extends Button {
    public SwipeButton(Context context) {
        super(context);
    }
    public SwipeButton(Context context, AttributeSet attrs) {
        super(context, attrs);
    }
    public SwipeButton(Context context, AttributeSet attrs, int defStyleAttr) {
        super(context, attrs, defStyleAttr);
    }
}
برای اینکه دکمه کار کند لازم است تا لیسنر onTouchEvent را مورد استفاده قرار دهید. در این لیسنر عملیات فشار بر روی دکمه، کشیدن و رها کردن آن ثبت می گردد، با افزودن کد زیر به کلاس SwipeButton تابع onTouchEvent را اورراید نمایید.
@Override
public boolean onTouchEvent(MotionEvent event) {
  switch (event.getAction()) {
      // when user first touches the screen we get x and y coordinate
      case MotionEvent.ACTION_DOWN: {
          //when user first touches the screen change the button text to desired value
          break;
      }
      case MotionEvent.ACTION_UP: {
          //when the user releases touch then revert back the text
          break;
      }
      case MotionEvent.ACTION_MOVE: {
          //here we'll capture when the user swipes from left to right and write the logic to create the swiping effect
          break;
      }
  }
  return super.onTouchEvent(event);
}
کد بالا سه مورد زیر را مدیریت می کند و در ادامه به این موارد با جزئیات پرداخته خواهد شد:
1. زمانی که کاربر برای بار اول دکمه را لمس می کند.
2. زمانی که کاربر دکمه را می کشد.
3. زمانی که کاربر دکمه را رها کرده (کشیدن را کامل کرده یا از وسط رها می کند).
1. زمانی که کاربر دکمه را لمس می کند
لازم است تا موارد زیر را به انجام برسانید:
1. مختصات X و Y از نقطه ای را که کاربر لمس کرده از آبجکت MotionEvent در فراخوانی onTouchEvent دریافت نمایید.
2. متن و رنگ دکمه را تغییر دهید.
کد موردنظر برای انجام این کار:
public class SwipeButton extends Button {
  private float x1;
  //x coordinate of where user first touches the button
  private float y1;
  //y coordinate of where user first touches the button
  private String originalButtonText;
  //the text on the button
  private boolean confirmThresholdCrossed;
  //whether the threshold distance beyond which action is considered confirmed is crossed or not
  private boolean swipeTextShown;
  //whether the text currently on the button is the text shown while swiping or the original text
  ...
  @Override
  public boolean onTouchEvent(MotionEvent event) {
      switch (event.getAction()) {
          case MotionEvent.ACTION_DOWN: {
              x1 = event.getX();
              y1 = event.getY();
              // when user first touches the screen we get x and y coordinate
              this.originalButtonText = this.getText().toString();
              //save the original text on the button
              confirmThresholdCrossed = false;
              //action hasn't been confirmed yet
              if (!swipeTextShown) {
                  this.setText(">> SWIPE TO CONFIRM >>");
                  //change the text on the button to indicate that the user is supposed to swipe the button to confirm
                  swipeTextShown = true;
              }
              break;
          }
          ...
      }
      return super.onTouchEvent(event);
  }
  }
2. زمانی که کاربر دکمه را می کشد
لازم است اقدامات زیر در صورتی که کاربر دکمه را بکشد انجام شوند:
1. تغییر متن در صورت تمایل
2. نمایش یک افکت کشیدن با دستکاری گرادینت، زمانی که کاربر در حال کشیدن دکمه است
از linearGradient به منظور نمایش افکت کشیدن استفاده می شود که یک افکت گرادینت شامل سه رنگ می باشد. به محض اینکه کاربر دکمه را بکشد این گرادینت با حرکت از چپ به راست افکت موردنظر را ایجاد خواهد کرد.
public class SwipeButton extends Button {
  ...
  private boolean swiping = false;
  private float x2Start;
  //whether the text currently on the button is the text shown while swiping or the original text
  @Override
  public boolean onTouchEvent(MotionEvent event) {
    switch (event.getAction()) {
      ...
      case MotionEvent.ACTION_MOVE: {
          //here we'll capture when the user swipes from left to right and write the logic to create the swiping effect
          float x2 = event.getX();
          float y2 = event.getY();
          if(!swiping){
              x2Start = event.getX();
              //this is to capture at what x swiping started
              swiping = true;
          }
          //if left to right sweep event on screen
          if (x1 < x2 && !confirmThresholdCrossed) {
              this.setBackgroundDrawable(null);
              ShapeDrawable mDrawable = new ShapeDrawable(new RectShape());
              int gradientColor1 = 0xFF333333;
              int gradientColor2 = 0xFF666666;
              int gradientColor2Width = 50;
              int gradientColor3 = 0xFF888888;
              double actionConfirmDistanceFraction = 0.6;
              //We'll get to how to be able to customize these values for each instance of the button
              Shader shader = new LinearGradient(x2, 0, x2 - gradientColor2Width, 0,
                      new int[]{gradientColor3, gradientColor2, gradientColor1},
                      new float[]{0, 0.5f, 1},
                      Shader.TileMode.CLAMP);
              mDrawable.getPaint().setShader(shader);
              this.setBackgroundDrawable(mDrawable);
              if (swipeTextShown == false) {
                  this.setText(">> SWIPE TO CONFIRM >> ");
                  //change text while swiping
                  swipeTextShown = true;
              }
              if ((x2-x2Start) > (this.getWidth() * actionConfirmDistanceFraction)) {
                  Log.d("CONFIRMATION", "Action Confirmed! Read on to find how to get your desired callback here");
                  //confirm action when swiped upto the desired distance
                  confirmThresholdCrossed = true;
              }
          }
      }
      ...
3. زمانی که کاربر دکمه را رها می کند
زمانی که کاربر دکمه را رها می کند دو احتمال وجود خواهد داشت:
1. کاربر قبل از تایید اقدام موردنظر دکمه را رها کند، بدین معنا که عملیات رها کردن دکمه تا قبل از رسیدن به آستانه مورد نظر برای تایید عملیات صورت پذیرد.
2. کاربر پس از تایید عملیات دکمه را رها کند، بدین مفهوم که فاصله موردنظر طی شده است.
هر دوی این موارد در قطعه کد زیر پوشش داده شده اند:
...
case MotionEvent.ACTION_UP: {
  //when the user releases touch then revert back the text
  swiping = false;
  float x2 = event.getX();
  int buttonColor = swipeButtonCustomItems.getPostConfirmationColor();
  String actionConfirmText = swipeButtonCustomItems.getActionConfirmText() == null ? this.originalButtonText : swipeButtonCustomItems.getActionConfirmText();
  //if you choose to not set the confirmation text, it will set to the original button text;
  this.setBackgroundDrawable(null);
  this.setBackgroundColor(buttonColor);
  swipeTextShown =  false;
  if ((x2-x2Start) <= (this.getWidth() * swipeButtonCustomItems.getActionConfirmDistanceFraction())) {
      Log.d("CONFIRMATION", "Action not confirmed");
      this.setText(originalButtonText);
      swipeButtonCustomItems.onSwipeCancel();
      confirmThresholdCrossed = false;
  } else {
      Log.d("CONFIRMATION", "Action confirmed");
      this.setText(actionConfirmText);
  }
  break;
}
...
چندین ویژگی مانند رنگ های گرادینت در حال حاضر هارد-کد شده اند و این مقادیر برای هر نمونه از دکمه ست خواهند شد و می توان توابع فراخوانی را برای زمانی که کاربر عملیات خاصی را با استفاده از دکمه به انجام می رساند ست کرد.
ست کردن ویژگی ها
ویژگی هایی که می توانید برای هر نمونه از SwipeButton سفارشی سازی کنید شامل موارد زیر می شوند:
- سه رنگ مربوط به گرادینت
- عرضی که توسط رنگ گرادینت دوم پوشش داده می شود
- کسری از فاصله ای از عرض دکمه که کاربر برای تایید اکشن باید تا آنجا را بکشد
- متنی که در صورت فشار یا کشیدن دکمه از سوی کاربر نمایش داده می شود
علاوه بر این شما می توانید گزینه ای را برای موارد زیر و اختصاص فراخوانی ها ارائه دهید:
- لمس و فشار دادن دکمه
- کشیدن دکمه تا میزانی که به منزله تایید عملیات تلقی شود
- رها کردن دکمه بدون تایید
به منظور تایید این ویژگی ها و فراخوانی ها یک کلاس دیگر بسازید و آن را انتزاعی کنید.
public abstract class SwipeButtonCustomItems {
    //These are the default values if we don't choose to set them later:
    public int gradientColor1 = 0xFF333333;
    public int gradientColor2 = 0xFF666666;
    public int gradientColor2Width = 50;
    public int gradientColor3 = 0xFF888888;
    public int postConfirmationColor = 0xFF888888;
    public double actionConfirmDistanceFraction = 0.7;
    public String buttonPressText = ">>   SWIPE TO CONFIRM   >> ";
    public String actionConfirmText = null;
    public int getGradientColor1() {
        return gradientColor1;
    }
    public SwipeButtonCustomItems setGradientColor1(int gradientColor1) {
        this.gradientColor1 = gradientColor1;
        return this;
    }
    public int getGradientColor2() {
        return gradientColor2;
    }
    public SwipeButtonCustomItems setGradientColor2(int gradientColor2) {
        this.gradientColor2 = gradientColor2;
        return this;
    }
    public int getGradientColor2Width() {
        return gradientColor2Width;
    }
    public SwipeButtonCustomItems setGradientColor2Width(int gradientColor2Width) {
        this.gradientColor2Width = gradientColor2Width;
        return this;
    }
    public int getGradientColor3() {
        return gradientColor3;
    }
    public SwipeButtonCustomItems setGradientColor3(int gradientColor3) {
        this.gradientColor3 = gradientColor3;
        return this;
    }
    public double getActionConfirmDistanceFraction() {
        return actionConfirmDistanceFraction;
    }
    public SwipeButtonCustomItems setActionConfirmDistanceFraction(double actionConfirmDistanceFraction) {
        this.actionConfirmDistanceFraction = actionConfirmDistanceFraction;
        return this;
    }
    public String getButtonPressText() {
        return buttonPressText;
    }
    public SwipeButtonCustomItems setButtonPressText(String buttonPressText) {
        this.buttonPressText = buttonPressText;
        return this;
    }
    public String getActionConfirmText() {
        return actionConfirmText;
    }
    public SwipeButtonCustomItems setActionConfirmText(String actionConfirmText) {
        this.actionConfirmText = actionConfirmText;
        return this;
    }
    public int getPostConfirmationColor() {
        return postConfirmationColor;
    }
    public SwipeButtonCustomItems setPostConfirmationColor(int postConfirmationColor) {
        this.postConfirmationColor = postConfirmationColor;
        return this;
    }
    //These methods listed below can be overridden in the instance of SwipeButton
    public void onButtonPress(){
    }
    public void onSwipeCancel(){
    }
    abstract public void onSwipeConfirm();
}
در این مرحله به یک setter در کلاس SwipeButton نیاز دارید که یک نمونه از این کلاس انتزاعی را معرفی کند. با استفاده از setter شما می توانید ویژگی ها و فراخوانی های موردنظر را ست کنید. در زیر کلاس SwipeButton را مشاهده می کنید که در آن تمامی ویژگی ها و فراخوانی هایی که از نمونه کلاس انتزاعی گرفته شده گنجانده شده است:
public class SwipeButton extends Button {
    private float x1;
    //x coordinate of where user first touches the button
    private float y1;
    //y coordinate of where user first touches the button
    private String originalButtonText;
    //the text on the button
    private boolean confirmThresholdCrossed;
    //whether the threshold distance beyond which action is considered confirmed is crossed or not
    private boolean swipeTextShown;
    private boolean swiping = false;
    private float x2Start;
    //whether the text currently on the button is the text shown while swiping or the original text
    private SwipeButtonCustomItems swipeButtonCustomItems;
    //in this instance of the class SwipeButtonCustomItems we can accept callbacks and other params like colors
    public SwipeButton(Context context) {
        super(context);
    }
    public SwipeButton(Context context, AttributeSet attrs) {
        super(context, attrs);
    }
    public SwipeButton(Context context, AttributeSet attrs, int defStyleAttr) {
        super(context, attrs, defStyleAttr);
    }
    public void setSwipeButtonCustomItems(SwipeButtonCustomItems swipeButtonCustomItems) {
        //setter for swipeButtonCustomItems
        this.swipeButtonCustomItems = swipeButtonCustomItems;
    }
    @Override
    public boolean onTouchEvent(MotionEvent event) {
        switch (event.getAction()) {
            case MotionEvent.ACTION_DOWN: {
                // when user first touches the screen we get x and y coordinate
                x1 = event.getX();
                y1 = event.getY();
                this.originalButtonText = this.getText().toString();
                confirmThresholdCrossed = false;
                if (!swipeTextShown) {
                    this.setText(swipeButtonCustomItems.getButtonPressText());
                    swipeTextShown = true;
                }
                swipeButtonCustomItems.onButtonPress();
                break;
            }
            case MotionEvent.ACTION_MOVE: {
                //here we'll capture when the user swipes from left to right and write the logic to create the swiping effect
                float x2 = event.getX();
                float y2 = event.getY();
                if(!swiping){
                    x2Start = event.getX();
                    //this is to capture at what x swiping started
                    swiping = true;
                }
                //if left to right sweep event on screen
                if (x1 < x2 && !confirmThresholdCrossed) {
                    this.setBackgroundDrawable(null);
                    ShapeDrawable mDrawable = new ShapeDrawable(new RectShape());
                    int gradientColor1 = swipeButtonCustomItems.getGradientColor1();
                    int gradientColor2 = swipeButtonCustomItems.getGradientColor2();
                    int gradientColor2Width = swipeButtonCustomItems.getGradientColor2Width();
                    int gradientColor3 = swipeButtonCustomItems.getGradientColor3();
                    double actionConfirmDistanceFraction = swipeButtonCustomItems.getActionConfirmDistanceFraction();
                    //Note that above we replaced the hard coded values by those from the SwipeButtonCustomItems instance.
                    Shader shader = new LinearGradient(x2, 0, x2 - gradientColor2Width, 0,
                            new int[]{gradientColor3, gradientColor2, gradientColor1},
                            new float[]{0, 0.5f, 1},
                            Shader.TileMode.CLAMP);
                    mDrawable.getPaint().setShader(shader);
                    this.setBackgroundDrawable(mDrawable);
                    if (swipeTextShown == false) {
                        this.setText(swipeButtonCustomItems.getButtonPressText());
                        //change text while swiping
                        swipeTextShown = true;
                    }
                    if ((x2-x2Start) > (this.getWidth() * actionConfirmDistanceFraction)) {
                        Log.d("CONFIRMATION", "Action Confirmed!");
                        //Note that below we inserted the desired callback from the SwipeButtonCustomItem instance.
                        swipeButtonCustomItems.onSwipeConfirm();
                        //confirm action when swiped upto the desired distance
                        confirmThresholdCrossed = true;
                    }
                }
                break;
            }
            case MotionEvent.ACTION_UP: {
                //when the user releases touch then revert back the text
                swiping = false;
                float x2 = event.getX();
                int buttonColor = swipeButtonCustomItems.getPostConfirmationColor();
                String actionConfirmText = swipeButtonCustomItems.getActionConfirmText() == null ? this.originalButtonText : swipeButtonCustomItems.getActionConfirmText();
                //if you choose to not set the confirmation text, it will set to the original button text;
                this.setBackgroundDrawable(null);
                this.setBackgroundColor(buttonColor);
                swipeTextShown =  false;
                if ((x2-x2Start) <= (this.getWidth() * swipeButtonCustomItems.getActionConfirmDistanceFraction())) {
                    Log.d("CONFIRMATION", "Action not confirmed");
                    this.setText(originalButtonText);
                    swipeButtonCustomItems.onSwipeCancel();
                    confirmThresholdCrossed = false;
                } else {
                    Log.d("CONFIRMATION", "Action confirmed");
                    this.setText(actionConfirmText);
                }
                break;
            }
        }
        return super.onTouchEvent(event);
    }
}
به منظور استفاده از SwipeButton در اکتیویتی یا فرگمنت، عناصر xml مربوطه را به لی اوت xml اضافه کنید:
<com.package.path.SwipeButton
    android:id="@+id/my_swipe_button"
    android:layout_width="400dp"
    android:layout_height="50dp"
    android:text="Button"
    android:layout_below="@id/hello_world"
    android:background="#888888"
    android:textColor="#ffffff"
    />
به منظور تخصیص فراخوانی ها و سفارشی سازی ویژگی هایی مانند رنگ، قسمت زیر را به MainActivity خود اضافه کنید:
public class MainActivity extends AppCompatActivity {
  @Override
  protected void onCreate(Bundle savedInstanceState) {
      super.onCreate(savedInstanceState);
      setContentView(R.layout.activity_main);
      SwipeButton mSwipeButton = (SwipeButton) findViewById(R.id.my_swipe_button);
      SwipeButtonCustomItems swipeButtonSettings = new SwipeButtonCustomItems() {
          @Override
          public void onSwipeConfirm() {
              Log.d("NEW_STUFF", "New swipe confirm callback");
          }
      };
      swipeButtonSettings
              .setButtonPressText(">> NEW TEXT! >>")
              .setGradientColor1(0xFF888888)
              .setGradientColor2(0xFF666666)
              .setGradientColor2Width(60)
              .setGradientColor3(0xFF333333)
              .setPostConfirmationColor(0xFF888888)
              .setActionConfirmDistanceFraction(0.7)
              .setActionConfirmText("Action Confirmed");
      if (mSwipeButton != null) {
          mSwipeButton.setSwipeButtonCustomItems(swipeButtonSettings);
      }
  }
}
موارد استفاده
استفاده از این نوع تعامل در دکمه ها می تواند جایگزین جالبی برای پیام تایید آزاردهنده باشد که می توانید بسته به کاربردهای مختلف آن را مورد استفاده قرار دهید.

 اپریویو